Section 4 Writing SWAT+ Input Files
The SWATBuildR cannot write the actual text files for our model setup, we have to use the SWAT+ Editor for this.
UPDATE: A tool has been created (author unknown) which writes our database for us in code form using python. The old section of doing it manually has been left in the doc (REF).
4.1 Writing Input Files via Python
The files which execute this operation can be found here:
As you can see, it uses python. The python environment is archived here:
We can execute our python script it like so:
IMPORTANT: now that the input files have been written, we will
ONLY modify these parameters with R and never edit parameters in
the Editor. The reason for this is because changing the values of the
text files will not change the values of the sqlite database. If
the input files are re-written from, the database, our changes to the
text files will be overwritten.
Let us test if our model works
4.1.1 SWAT+ Test Run
We will copy in our SWAT+ executable, our input files, and our weather files into a folder and run SWAT+ as a test.
For some reason, when writing the SWAT+ input files, it does not write the weather station data. I am not sure if this is intended or not. the SWAT+ model still runs fine, however maybe it is using the weather generator? The meteo input files are located in the same directory as the
sqlite, probably becausesvatoolsput them there? #TODO
Our current SWAT+ version is rev60.5.4_64rel.exe but this is subject
to change
Make a run directory and enable code running.
Copy all required files into this directory:
sta_files <- list.files("model_data/cs10_setup/optain-cs10/",
             pattern = "sta_", full.names = T)

cli_files <- list.files("model_data/cs10_setup/optain-cs10/",
                        pattern = ".cli", full.names = T)

input_files <- list.files("model_data/cs10_setup/swat_input/",
                       full.names = T)

path_to_swat <- "model_data/cs10_setup/rev60.5.4_64rel.exe"


source_files <- c(sta_files, cli_files, input_files, path_to_swat)


status <- file.copy(from = source_files,
                    to = "model_data/cs10_setup/run_swat/",
                    overwrite = T)
Lets run some checks on these files
if(any(status == FALSE)){
  warning("Some files were not copied:")
  print(source_files[which(status==FALSE)])
}

print(
  paste(
    length(which(status)),
    "of",
    length(source_files),
    "files were copied into the run folder, amounting to a size of ",
    round(sum(file.info(source_files)$size * 1e-6), 2),
    "megabytes"
  )
)
Now lets run the model to make sure it works
# update time sim
time_sim <- readLines("model_data/cs10_setup/run_swat/time.sim")
time_sim[3] <- "       0      2011         0      2011         0  "
writeLines(text = time_sim, con = "model_data/cs10_setup/run_swat/time.sim")

msg <- processx::run(command = "rev60.5.4_64rel.exe",
              wd = "model_data/cs10_setup/run_swat/")


simout <- readLines("model_data/cs10_setup/run_swat/simulation.out")

cat(tail(simout), sep = "\n")
It will be useful to test SWAT+ along our journey, so we will reuse this
code in the function test_swat()
We can now continue with our final buildR step
4.1.2 Link aquifers and channels with geomorphic flow
A SWATBuildR model setup only has one single aquifer (in its current
version). This aquifer is linked with all channels through a
channel-aquifer-link file (aqu_cha.lin) in order to maintain recharge
from the aquifer into the channels using the geomorphic flow option of
SWAT+.
The required input file cannot be written with the SWAT+Editor. Therefore it has to be generated in a step after writing the model text input files with the SWAT+Editor.
Path of the TxtInOut folder (project folder where the SWAT+ text files
are written with the SWAT+Editor)
Linking the aquifer to the channels
project_path <- 'model_data/cs10_setup'
project_name <- 'optain-cs10'
source('model_data/code/swat_buildR/init.R')

link_aquifer_channels(txt_path)
This created the file aqu_cha.lin and changed file.cio to point to
it (row 16, column 3)
Let us test to see if SWAT+ still runs
Success.
4.2 Writing the input files with the SWAT Editor
If for some reason you cannot or do not want to write the input files via code, a step by step guide is below which shows you how to do it with the editor.
4.2.2 Writing input files

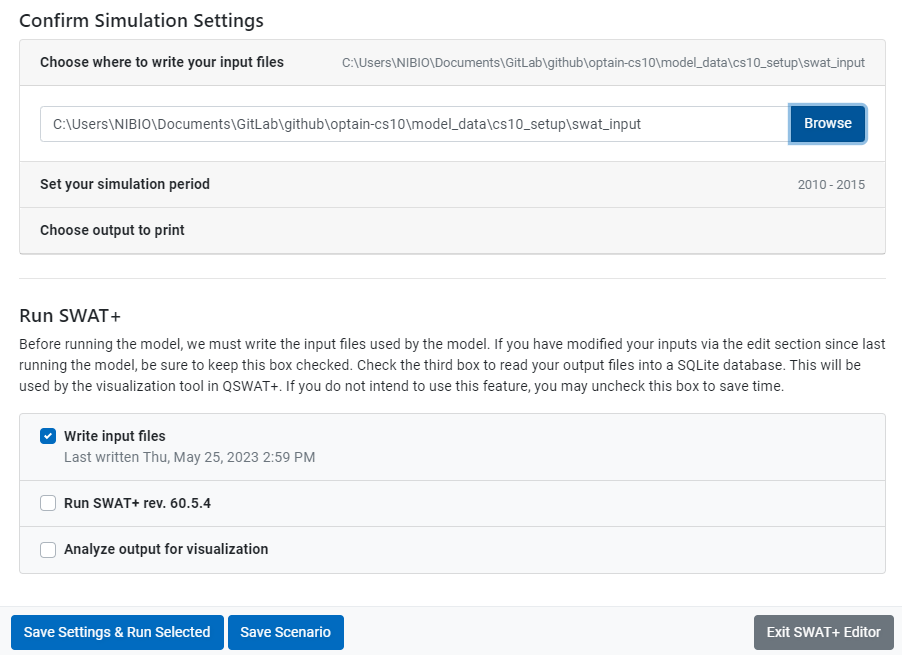
- After clicking on the Run Model / Save Scenario button, you arrive
at the “Confirm Simulation Settings” page. Here you need to choose
where to write your input files. We have chosen
cs10_setup/swat_input. - We have also changed our simulation time period, but this is not required.
- Make sure to un-check “Run SWAT” and “Analyze output for visualization”
- “Save settings & Run Selected”
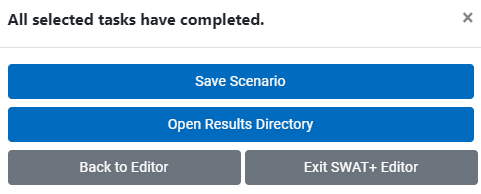
Your SWAT+ input files will be generated, and you will be prompted to Save Scenario. This is not recommended, because in our testing, the scenario saving would recursively generate new scenarios within the same folder, until all file space had been exhausted on the drive. This extremely deep folder brings windows to its knees, even when trying to delete it using explorer (Use Powershell instead).